A full shower column that mounts on the wall you already have.
Rainfall head above, handheld on a sliding rail, and a mixer at the base that feeds the bath as well. Everything sits on the surface — which means no wall comes down to fit it, and nothing is buried if it ever needs servicing.
What you get
-
Rectangular rainfall head, 31.5 × 21 cm, on a curved gooseneck arm — wide, even coverage rather than a single jet
-
Handheld shower, 27.5 cm, on a 1.5 m flexible steel hose
-
Sliding bracket — moves up and down the rail and rotates a full 360°, then locks where you leave it
-
Mixer with diverter at the base, switching between rainfall, handheld and bath spout
-
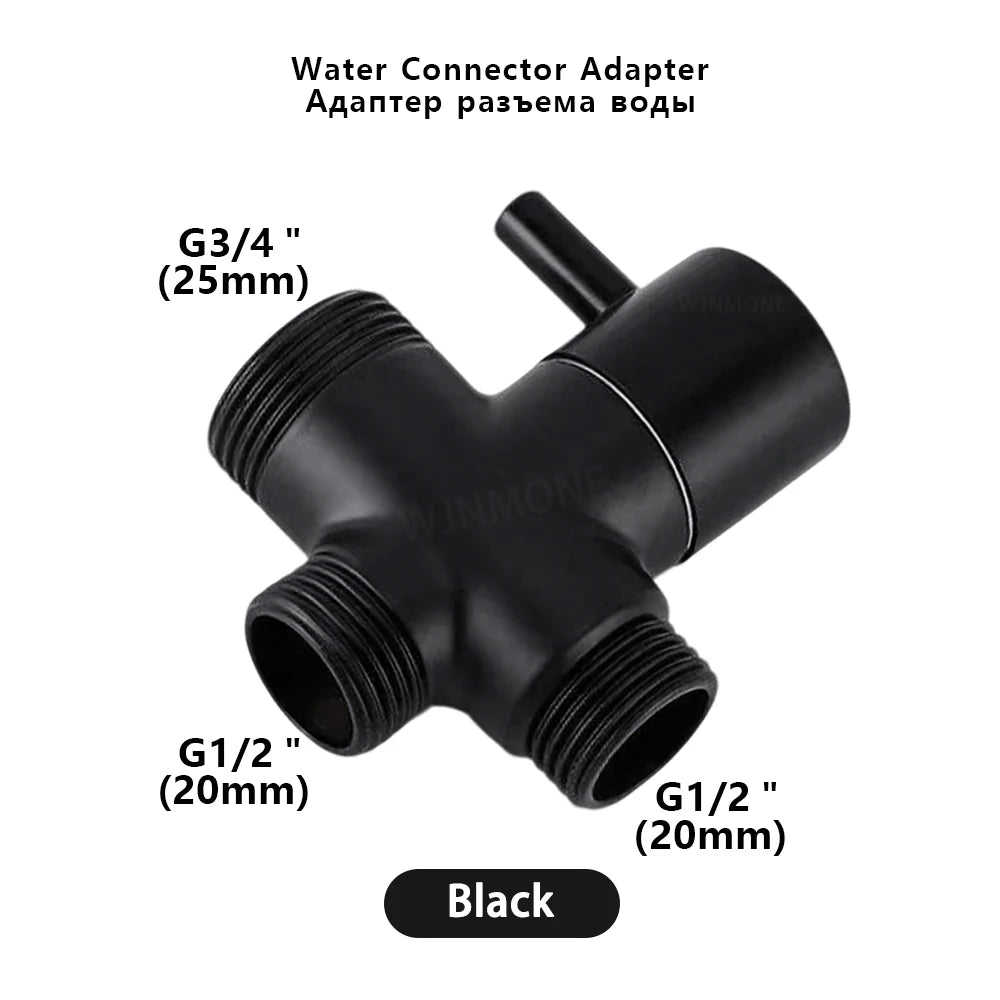
Water connector adapter included — G3/4″ inlet, twin G1/2″ outlets
The sliding rail
The bracket runs the height of the column, rotates 360°, and clamps where you leave it. That is the part that matters in a shared bathroom — everyone gets the height and angle they want, without wrestling a fixed holder with wet hands.
Two finishes
Matte black, or polished silver. Both are finished over the same body, so the choice is aesthetic rather than a compromise on what sits underneath.
Specifications
| Finishes |
Matte black · Polished silver |
| Materials |
Stainless steel, copper, ABS |
| Rainfall head |
31.5 × 21 × 1.8 cm |
| Handheld |
27.5 cm, on 1.5 m steel hose |
| Sliding bracket |
10 × 3.5 cm, 360° rotation |
| Inlet thread |
G3/4″ (25 mm) |
| Outlet threads |
G1/2″ (20 mm) |
| Mounting |
Wall-mounted, exposed |
Installation
A plumber is recommended — though this is the approachable kind of shower system.
An exposed column mounts on the finished wall and connects to the hot and cold outlets already there. In most cases no wall is opened, no permit is needed, and every component stays reachable afterwards. That makes it a realistic weekend job for a confident DIYer, and a quick one for a plumber.
-
Shut off the hot and cold supply and open the old fitting to drain the lines before you touch anything.
- Remove the existing mixer and clean the exposed threads back to bare metal. Old tape and limescale are why new joints weep.
-
Measure your outlet centres. Most exposed systems expect 150 mm centre to centre. The connector adapters supplied rotate to absorb a small mismatch — that is exactly what they are for.
-
Check your thread sizes. The adapter takes a G3/4″ (25 mm) inlet and gives twin G1/2″ (20 mm) outlets. If your wall outlets are a different size you will need a reducer, sold in any plumbing merchant.
- Wrap PTFE tape clockwise onto the outlet threads, so it tightens rather than unwinds as you screw in.
- Fit the adapters, set them level and to the right spacing, then mount the mixer body and fit the cover plates over the joints.
- Mount the column, hang the head, connect the handheld hose, then restore the water slowly and check the diverter moves cleanly between rainfall, handheld and spout.
Where it stops being DIY: if your outlet spacing falls outside the range of the adapters, if the existing threads are corroded, or if the wall has to be opened for any reason. That becomes licensed work, and in most US jurisdictions it then needs a permit and inspection.
You will need: adjustable wrench, PTFE tape, level, tape measure and silicone, plus a drill if the rail brackets fix into tile. Allow an hour or two.
Care
Wipe with a soft damp cloth. Avoid abrasives and bleach-based cleaners — on matte black they leave permanent shine marks.